How to Remove Lashes Safely: Precision, Care, and Best Practices
How to Remove Lashes Safely: Precision, Care, and Best Practices
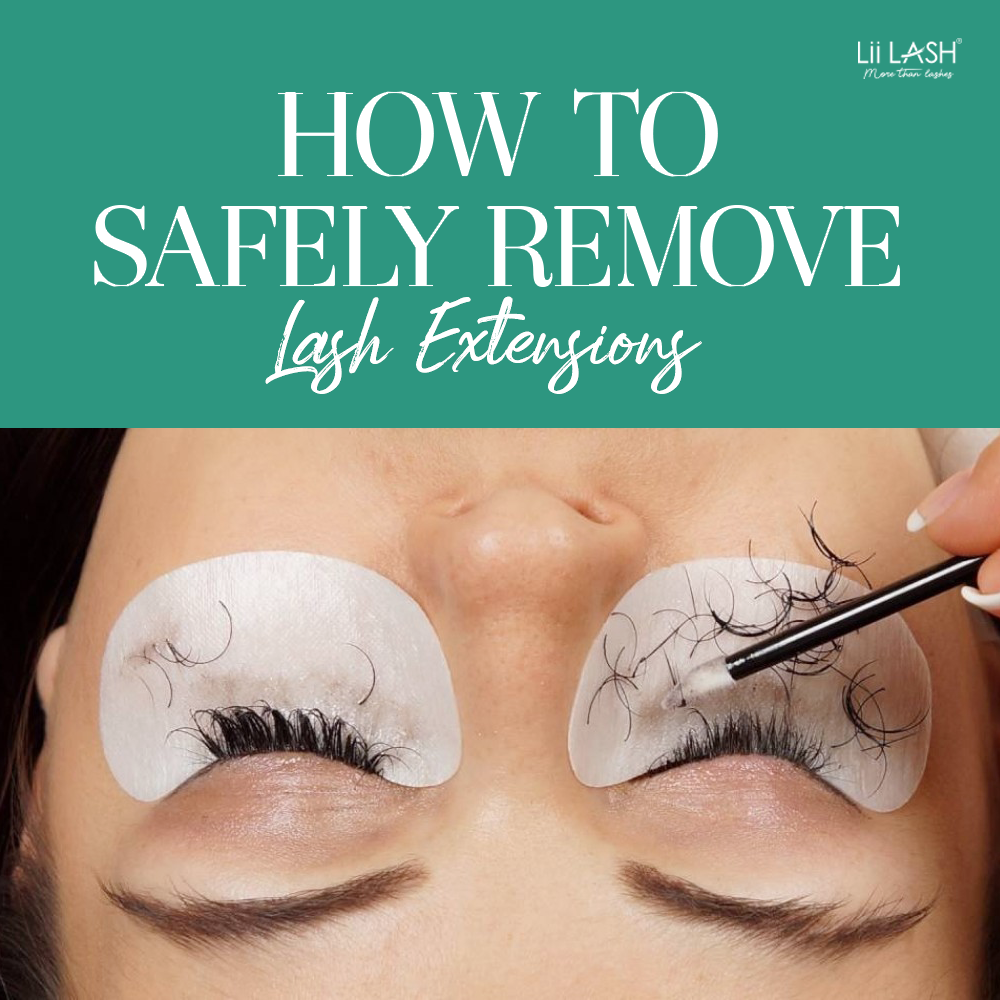
For many, false lashes enhance identity and confidence—but their removal demands as much attention as application. Incorrect techniques can damage eyes, cause irritation, or ruin the delicate beauty these adornments bring. This guide explores proven methods for safely removing lashes, emphasizing precision, protective care, and reliable results—whether for home use or professional settings.
Lashes serve as natural facial accents, influencing perception and expression. However, when a washout goes wrong—whether due to adhesive residue, disintegrating fibers, or accidental eye contact—the need for removal arises with care. Understanding the anatomy of the eyelash, paired with proper tools and techniques, transforms a potentially risky task into a straightforward procedure.
As dermatologists stress, “The eye is uniquely sensitive; any removal method must prioritize tissue integrity and avoid trauma.”
Essential Tools and Preparation for Safe Lashes Removal
A successful lashes removal begins with the right instruments and environment. Key tools include: - Soft cotton-tipped swabs or microfiber pads for gentle grip and cleaning - Plastic or wooden eyelash removers designed to minimize pressure - Warm water and mild, fragrance-free cleanser for residue dissolution - Cotton balls or sterile gauze for控法 control during application - A well-lit, clutter-free space to prevent accidental contact with eye surfaces “Preparation is the first step toward preventing complications,” advises ocular care specialist Dr. Elena Marquez.“Ensure hands are washed thoroughly and all tools are clean and sterilized—especially critical for sensitive eye areas.” The process starts with dissolving adhesive using warm water and a diluted cleanser. Swishing gently helps loosen bond without stressing the lash follicle.
Following gentle cleaning, visually inspect the lash bed for shed hairs or crusting buildup.
Removing stray fibers with tactile precision avoids tugging and spread. Important: never use fingernails, sharp objects, or aggressive force—each risks corneal injury or hyphema formation.
Step-by-Step Guide to Removing False and Natural Lashes
Removing lashes requires rhythmic control and layered approach: 1. **Initial Dissolution**: Apply a small amount of warm water mixed with a mild cleanser directly on the lash base.Hold gently for 15–30 seconds to soften adhesive formation. 2. **Ascent with Shielding**: Use a sterile cotton swab to lift the lash root from the eyelid margin, working upward toward the lash line.
Avoid swiping across the cornea. 3. **Gentle Extraction**: Employ a dedicated eyelash remover or the inner curve of a safe brush to slide beneath the lash, releasing it in one smooth motion.
4. **Residue Removal**: After each removal, clean the area with a fresh cotton pad dampened with warm water to wipe away dissolved glue and scattered hairs. A soft breeze from a hair dryer on low (held at arm’s length) can further clarify remaining debris.
5. **Post-Removal Care**: Apply a gentle ophthalmic moisturizer or preservative-free eye cream to restore hydration and soothe epithelial tissues. Avoid rubbing eyes for at least 20 minutes.
- Always work the lash upward, never downward, to prevent interaction with the cornea.
- For natural lashes, avoid yanking—use just enough pressure to guide removal.
- If lashes are stubborn, multiple gentle attempts minimize tissue stress; repeated force often causes scarring.
Home vs. Professional: When to Seek Expert Help
While most individuals can safely handle occasional lashes removal at home using minimal tools, certain scenarios demand professional intervention: - Persistent adhesive or multiple re-attachment attempts causing irritation - Signs of infection (redness, swelling, pain) post-removal - Removal involving delicate natural lashes close to the eyelid margin - Medical concerns such as dry eye syndrome or previous lid trauma Dermatologists emphasize that licensed practitioners possess both elevated expertise and access to ophthalmoscopes and advanced tools to assess eye health before and after removal. Clinical settings reduce error rates and provide immediate treatment if complications arise, ensuring safe outcomes without long-term damage.Best Practices for Long-Term Lash Care and Removal
Preventing future issues starts with mindful application: - Use only FDA-cleared, hypoallergenic adhesives designed for eye-friendly removal. - Store lashes in airtight, cool containers away from moisture and direct sunlight. - Remove lashes gently in the morning or evening, avoiding frequent stripping without proper skincare.- Always follow a consistent clean-up routine post-removal to prevent crusting and bacterial buildup. “Regular, gentle care preserves both aesthetic appeal and ocular integrity,” notes cosmetic ophthalmologist Dr. Rajiv Nair.
“Treating lashes as delicate heritage—rather than disposable—builds long-term confidence without risk.”
Final Thoughts: Safe Management, Confident Expression
Correctly removing lashes merges technical know-how with compassion—honoring both personal beauty and delicate eye anatomy. Using proper tools, attentive technique, and restorative care transforms a routine hygiene step into an empowering ritual of self-respect. Whether done at home or by a professional, mastering this process ensures strokes of elegance never compromise the windows to the soul.In mastering how to remove lashes, we safeguard not just appearance, but overall eye health—allowing confidence to shine, unobstructed and resilient.

Related Post

How to Remove Lashes at Home: A Precise, Safe, and Effective Guide
/cdn.vox-cdn.com/uploads/chorus_image/image/70515849/1234765603.0.jpg)
Spring Training Standings: The Road to Season Success Begins in Week 1

Xabi Alonso’s Quiet Classic: The Life Behind the Stallion’s Silence — The Wife Who Shapes His World